How Can We Help?
Table of Contents
Overview
This document describes the integration process between FenixDFA and Azure Backup, detailing the required configuration steps and data needed for successful integration.
Prerequisites
- Azure portal access with administrative privileges
- Active Azure subscription
Configuration Process
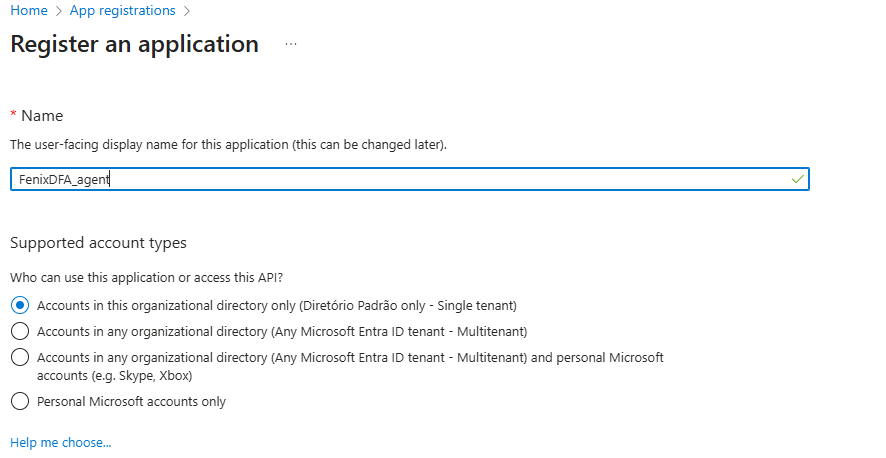
1. Create App Registration
- In the Azure Portal, navigate to App registrations
- Click on New registration
- Fill in the required information and create the registration
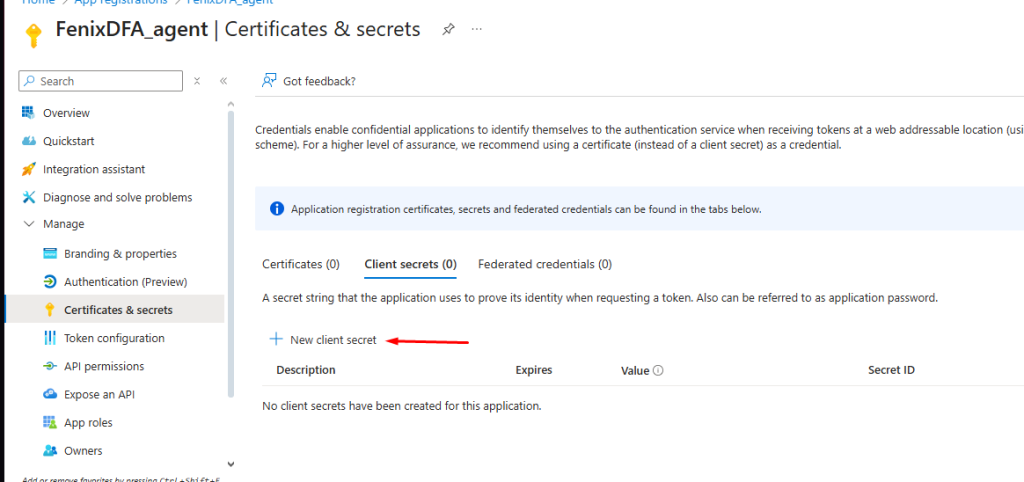
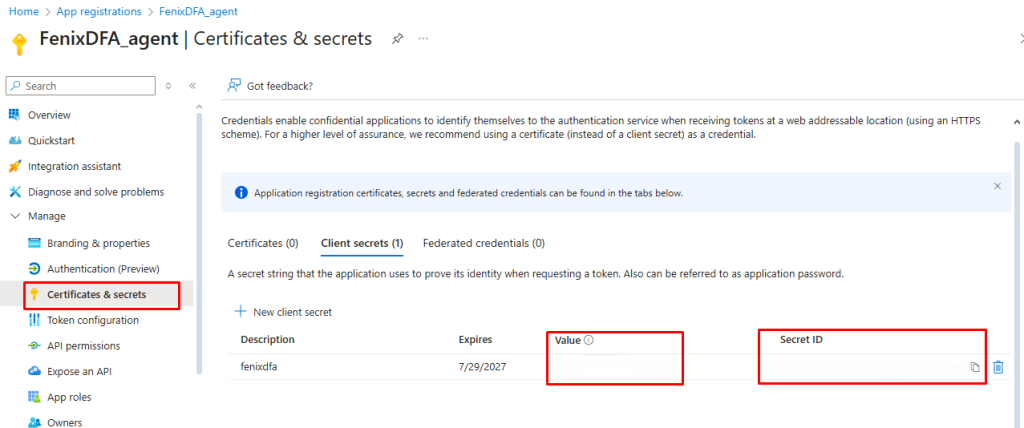
2. Configure Client Secret
- In the created App registration, access Certificates & secrets
- Select New client secret
- Configure the validity period and description
- IMPORTANT: Copy the Client secret value immediately after creation, as it cannot be viewed later
3. Configure Permissions
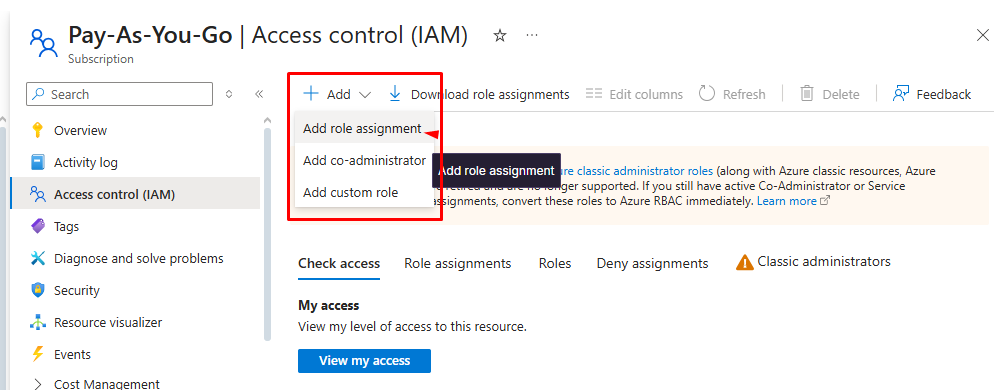
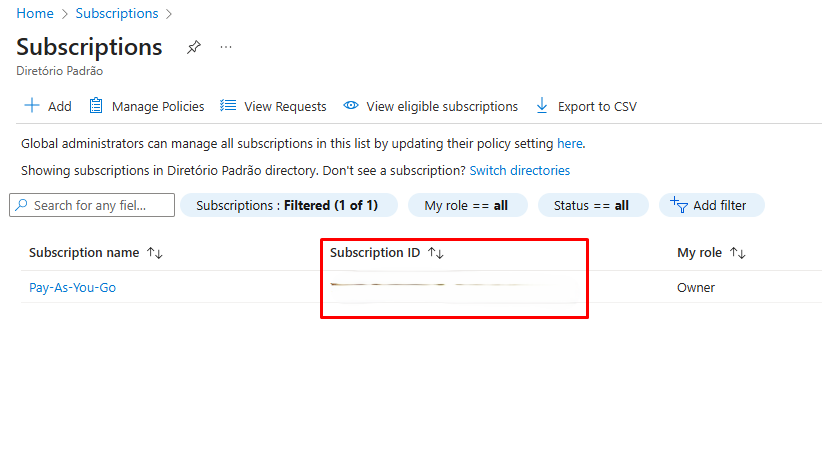
- Access Subscriptions in the Azure portal
- Select the desired subscription
- Navigate to Access control (IAM)
- Click Add
5. In Role, select Reader
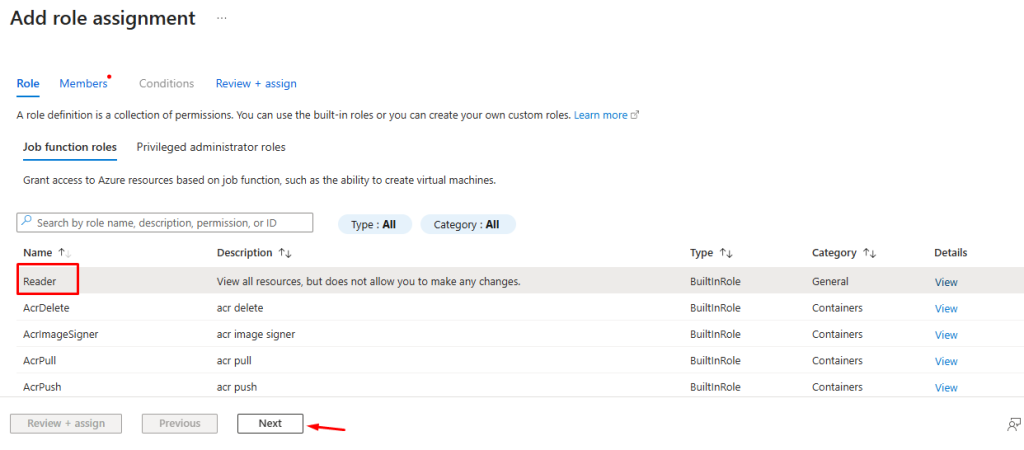
6. In Assign access to, choose User, group or service principal
7. Click Select members
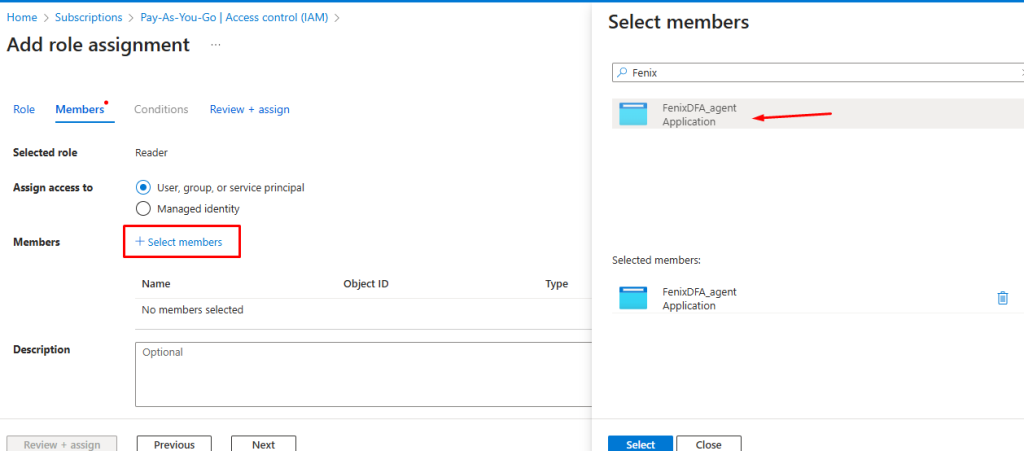
8. Search and select the previously created app registration
ALLOW GROUP 'Default'/'fenixdfa' to inspect all-resources IN TENANCYRequired Integration Data
To complete the integration, you will need the following data:
Application (client) ID (App registration main page)
Directory (tenant) ID (App registration main page)

Value Client Secret (Certificates & secrets)
Subscription ID (Subscription page)
Security Considerations
- Store the Client Secret in a secure location
- Use appropriate secrets management for storing credentials
- Review granted permissions periodically
- Configure periodic Client Secret rotation
Troubleshooting
Common Issues
- Access Denied
- Verify that permissions are correctly assigned
- Confirm that the Client Secret is valid and has not expired
- Authentication Failure
- Verify all IDs are correct
- Confirm that the App registration is active
Support
If you encounter integration issues, contact technical support providing:
- Application and directory IDs
- Error logs (if available)
- Detailed description of the encountered problem